Generate crash reports for your win32 / C++ project
In this article, we’ll look at how to set up a crash report system in your C++ program. It will generate a zip file with a dump (usable in Visual Studio) and you can even integrate your logs. However, I’m only going to discuss Windows (Win32) and not Linux / MacOS. More specifically, BugTrap, which is, in my opinion, the best for this platform. Note that there are alternatives such as Breakpad or Crashpad, which are cross-platform, but lack an “interface” to indicate to the end-user that there has been a problem.
First of all, what is BugTrap?
“BugTrap is a tool to catch unhandled exceptions in unmanaged and managed .NET code. BugTrap also supports sending crash reports to a remote server for analysis.
BugTrap is a tool designed to capture unhandled exceptions in managed (C# / .NET) and unmanaged (C++) code. It also supports sending crash reports to a remote server for analysis. BugTrap offers you a unique way of automatically collecting and visualizing exceptions generated in all your software. Easy to install and use, BugTrap will automatically collect and aggregate unhandled exceptions from all your different applications in one place. This enables you to find bugs in your software.
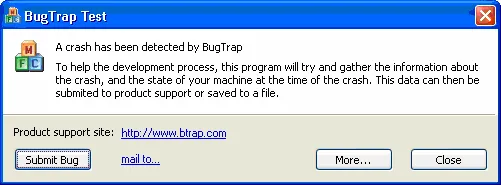
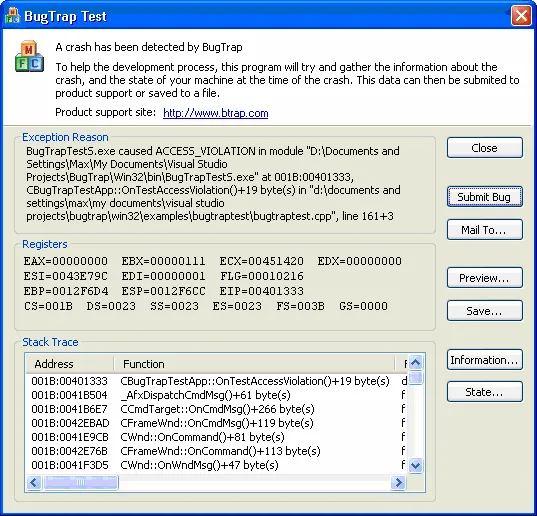
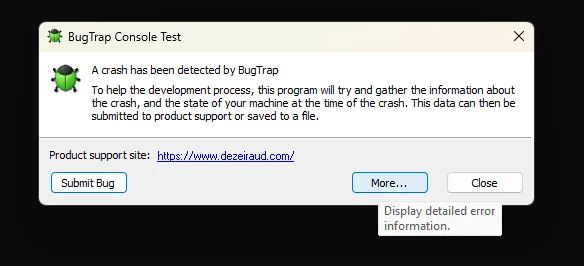
The advantage of BugTrap over other solutions is that it has an interface that indicates to the end user that something has gone wrong. And that sending the crash report is OPTIONAL (for GDPR and as a matter of principle). Here are a few images (taken from BugTrap’s Github):
Compiling
For the moment, I recommend using my fork (which is in PR), which adds support for Visual Studio 2019 and 2022. But the official repository is available at https://github.com/bchavez/BugTrap.
From now on, it’s quite simple: in the newly created folder, go to “source” then open the project. For me, it’ll be BugTrap.vs2022.sln.
Please note that you need the “Desktop C++ Development” workload in Visual Studio Installer. As well as in the individual C++ MFC components for the latest version of Build Tools v143 (x86 & x64). In order to compile BugTrap.

As you can see, several versions of BugTrap are compilable. It’s up to you to decide which version suits your needs. In general, the Unicode version is preferable.
Then right-click on the project in the Visual Studio explorer and select “Build”. You’ll find the DLL you’ve just generated in the BugTrap/bin/ folder. BugTrapU-x64 the U stands for Unicode (if you’re using this version).
Integration into a program
Now you just need to configure your project correctly.
In other words:
- Copy the BugTrap headers and bin folder to a folder in your project (e.g. ThirdParty).
- Configure Additional Include Directories in your project.
- Put BugTrapU-x64.lib in the linker.
And a code who crash!
#include <iostream>
#define WIN32_LEAN_AND_MEAN#include <Windows.h>#include <Tchar.h>#include <BugTrap.h>
static void SetupExceptionHandler(){ // Setup exception handler BT_SetAppName(_T("BugTrap Console Test")); BT_SetFlags(BTF_DETAILEDMODE); BT_SetSupportURL(_T("https://www.dezeiraud.com/"));
// required for VS 2005 & 2008 BT_InstallSehFilter();}
int main(){ SetupExceptionHandler(); std::cout << "Hello World!\n";
// Segfault int* p = nullptr; *p = 1; std::cout << *p << std::endl;}But that’s not all. Unfortunately, as it stands, BugTrap will detect our operating system as Windows 8. For Windows 10 and 11 to be correctly detected, you need to add an app.manifest file to the project root. With the following contents:
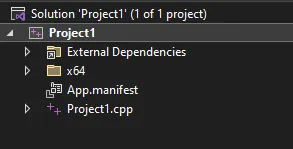
<?xml version="1.0" encoding="UTF-8" standalone="yes"?><assembly xmlns="urn:schemas-microsoft-com:asm.v1" manifestVersion="1.0"> <assemblyIdentity name="YOURAPPNAME" version="1.0.0.0" type="win32" /> <dependency> <dependentAssembly> <assemblyIdentity type="win32" name="Microsoft.Windows.Common-Controls" version="6.0.0.0" processorArchitecture="*" publicKeyToken="6595b64144ccf1df" language="*" /> </dependentAssembly> </dependency> <compatibility xmlns="urn:schemas-microsoft-com:compatibility.v1"> <application> <!-- Windows 10 & 11 --> <supportedOS Id="{8e0f7a12-bfb3-4fe8-b9a5-48fd50a15a9a}"/> <!-- Windows 8.1 --> <supportedOS Id="{1f676c76-80e1-4239-95bb-83d0f6d0da78}"/> <!-- Windows 8 --> <supportedOS Id="{4a2f28e3-53b9-4441-ba9c-d69d4a4a6e38}"/> <!-- Windows 7 --> <supportedOS Id="{35138b9a-5d96-4fbd-8e2d-a2440225f93a}"/> <!-- Windows Vista --> <supportedOS Id="{e2011457-1546-43c5-a5fe-008deee3d3f0}"/> </application> </compatibility></assembly>With BT_SetFlags you can even define additional flags, for example to include a screenshot of your application at crash time (BTF_SCREENCAPTURE). Or your own log files in the final archive. I invite you to read the documentation to see the possibilities https://github.com/bchavez/BugTrap/blob/master/doc/BugTrap.pdf.
Now, starting the previous application in Release (with a build in debug, BugTrap will not be called). It should crash directly on launch, with the BugTrap window. Let’s save the error report. Click on “more…” in the BugTrap window, a new window opens and Save.
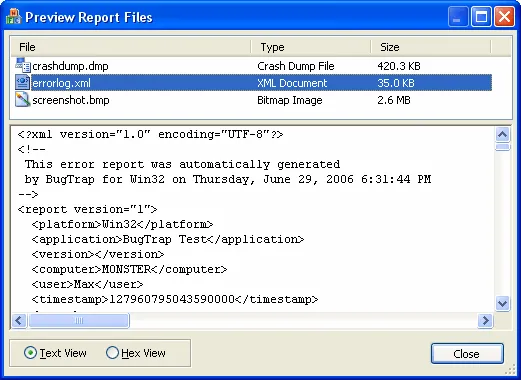
You should have a zip with the following content:
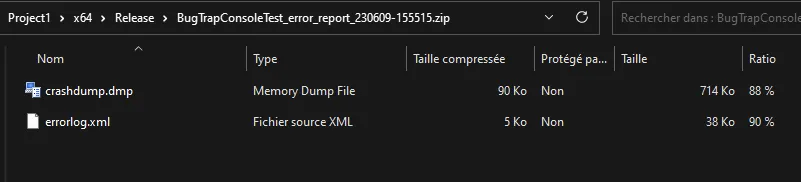
This is your crash report. The errorlog.xml contains information about the user’s machine where your application crashed (RAM, operating system, processor, etc.) and the crashdump.dmp.
You can open the errorlog.xml with the CrashExplorer project in BugTrap’s Visual Studio project. This is a tool for the developer (you) to visualize the information with an interface. If you’re not a fan of XML.
Once you’ve extracted the crashdump.dmp, you can open it in Visual Studio (then in Actions on the right, Debug with Native Only). Please note that you need the same version of your project’s code as the version with which the user crashed. In fact, thanks to the .dmp file, Visual Studio will tell you where the exception occurred in your code.
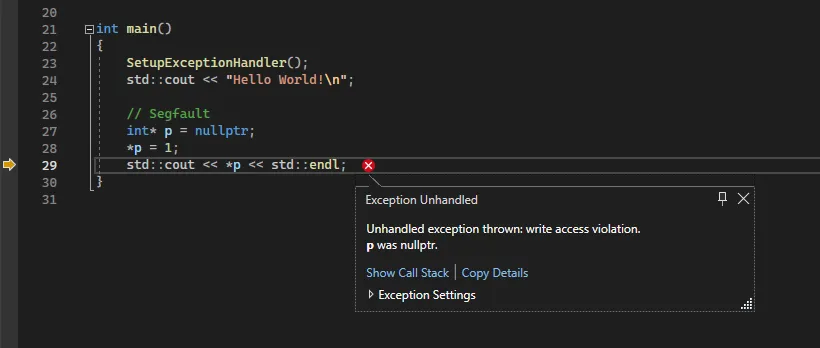
With the values of the variables associated with that moment. With this information, you should have everything you need to correct the bug in your program and deploy an update!